
Exploring Triangles with GSP
By Rebecca L. Adcock
![]()
The subject of this exploration is triangles but in construction we will use parallel lines. So before we begin, let’s review properties of parallel lines.
We can use Geometer’s Sketchpad (GSP) to create parallel lines with no effort on our part; we just choose it off a menu.
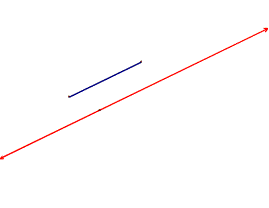
I constructed the line segment (blue) and the tiny blank point you see on the red line. Then I selected “Construct” and “Parallel line” and GSP created the red line. (More about that in a minute.)
How did I know that I needed a line and a point to create a line parallel to mine? Because one of the basic rules of geometry is called Euclid’s 5th Postulate and it says:
Given a line and a point not on the line, there is a unique line that passes through the point and is parallel to the given line.
The GSP program took my line segment and point and drew a parallel line, not magically, but by constructing two perpendicular lines.
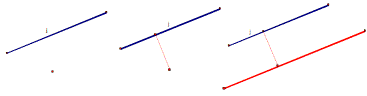
Two pairs of parallel lines that intersect create a parallelogram.
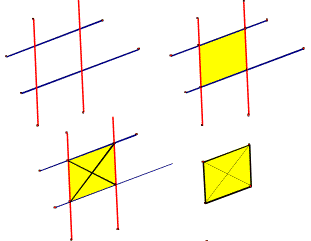
A parallelogram ….
- is a quadrilateral (fancy name for a 4-sided figure) where both pairs of opposite sides are parallel.
- has opposite sides that are congruent.
- has opposite angles that are congruent.
has diagonals that bisect each other
Now we can use the properties of parallel figures to construct a second triangle from a given triangle’s medians.
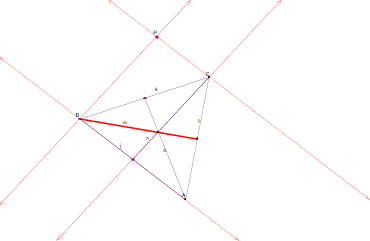
We start with a triangle. The line segments crossing the triangle’s interior are its median. Each median connects a vertex to the opposite side’s midpoint. I selected one median (in red) as the first side of our new triangle. I also created 2 parallel lines. The red dotted line through point B is parallel to median n that passes through vertex C. The red dotted line through C is parallel to line segment j that is one side of the original triangle.
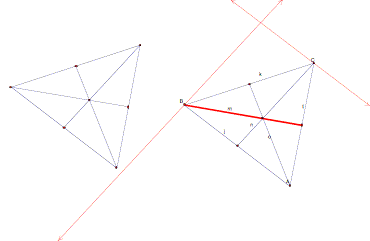
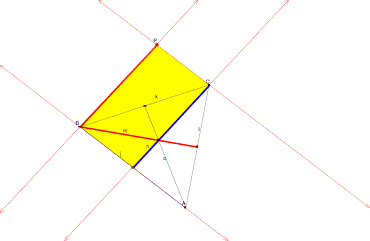
The lines I constructed in the previous steps were the important ones that will define the second side of our triangle. But just to show you that we are using the properties of the parallelogram, here’s what our triangle looks like drawn with all four sides of the parallelogram.
Now we can construct the second side of our triangle. See below. The blue segment is the median we are using to construct the second side of the triangle. The second side of our new triangle is the red segment connecting point B and point P.
We’ll use the third median to construct the third side of our triangle.
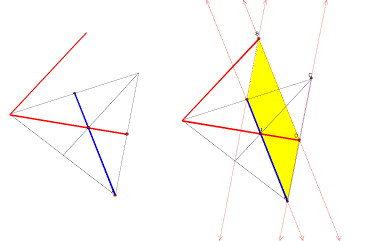
Here’s what our drawing looks like with the parallelogram. The blue segment is equivalent (congruent) to the line segment that will join point B to point D because (everybody say it together)….
Opposite sides of a paralleogram are congruent!
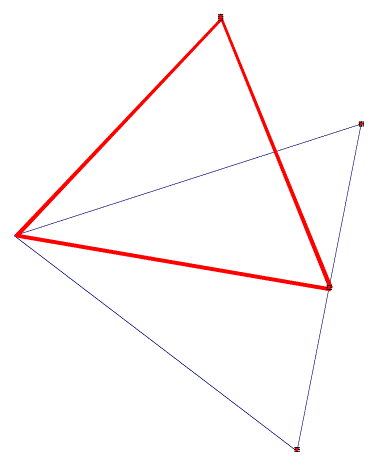
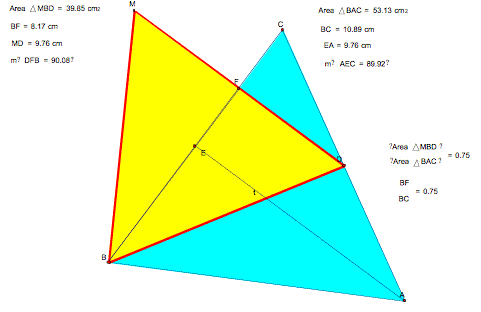
Here is our finished product.
Now let’s test our triangles for congruency, similarity, proportionality and anything else we can think of. Click on the GSP box and move the triangle around. Notice that there is only one measurement that seems significant. Which one is it?
![]()
The ratio of the areas remains set at .75. So the triangle created from the medians is the smaller triangle and its area is ¾ that of the original triangle. Now we have to explain why. On further investigation, I found that one side of our created triangle is ¾ the side of the original triangle. For ease of demonstration I manipulated our triangles until I had a median that could also serve as the altitude. The base MD of our created triangle is the side we created from the Height of our original triangle . Since these two segments are opposite sides of a parallelogram, they are congruent. The height of our created triangle (segment BF) is ¾ the base (segment BC) of our original triangle.
We calculate the area of a triangle as ½ BH where B is Base and H is Height (altitude).
Area of Triangle ABC = ½ ( Base BC) ( Height EA)
Area of Triangle MBD = ½ ( Base MD) ( Height BF)
Since Height EA=Base MD and Height BF = 3/4 (Base BC), then (Area of Triangle MBD) = ¾ (Area of Triangle ABC).
If you desire, plug the numbers from the picture above into the formula and crunch the numbers.