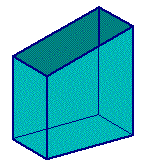

To construct the expanded pattern of rectangular ducts, we must first identify certain components of our shape. Given the plan (base) and elevation (side) of the rectangular duct, we can geometrically construct the two dimensional expanded pattern (surface). Essentially we are "unfolding" the rectangular duct from three dimensions into two dimensions.
First, we must set up the plan, elevation, and base of the expanded pattern to be useful in our construction. In each of these constructions, it is important the base directly correspond with the elevation so parallel lines can be drawn from the base to the elevation. Similarly, it is important to position the base of the expanded pattern at the base of the elevation. That way, lines parallel to the base can be drawn between the elevation and expanded pattern to construct the expanded pattern. Notice the red dashed lines are aligning our three images.
The expanded pattern represents the unfolding of the rectangular duct. Therefore, it has a length that is equal to the perimeter of the plan. Draw the base of the expanded pattern and label points A D to correspond with the points on the plan. Note that segment AB on the plan is congruent to segment AB on the expanded pattern, segment BC on the plan is congruent to segment BC on the expanded pattern, and so on.
Why are there two points A on the expanded pattern? Well, remember the expanded pattern has been unfolded. So when reassembled, this pattern will be our three dimensional rectangular duct with a seam at point A. So, basically, these points A are the same.

Now labeling these points A D on the base, allows us to find their corresponding heights on our rectangular duct. In other words, each of these points on the plan (the bottom of our duct) has a specific height on the elevation (the side of the duct). We must determine what height it is, in order to complete the expanded pattern. So, draw line a, line b, line c, and line d on the expanded pattern perpendicular to the base of the expanded pattern.
Also, notice that at point A on the elevation, our rectangular duct has a point at A'. Similarly at point B on the elevation, our duct has a height of point B'. Label both of these points as shown below. Since our duct is rectangular and not round, these two height as sufficient to complete the entire expanded pattern.

Now, draw line a' and line b' parallel to segment AB of the elevation. Line a' intersects point A' on the elevation, and similarly line b' intersects point B' on the elevation. Basically we are reflecting the heights of our rectangular duct onto our expanded pattern.
So, label the intersections of line a and line a' as point A'. Similarly, label the intersections of line b and line b' as point B' as shown below.

Finally, we can remove our construction lines and connect our points to see the completed expanded pattern. So, if you were to fold our expanded pattern back in to our rectangular shape, you would have a duct with the size of the given plan and given elevation!

Click here to view the Geometer's Sketchpad file that generated the rectangular pattern.
Click here to view
the Geometer's Sketchpad file of the three-dimensional rectangular
duct.
Return to Essay
2: Complete the Pattern