
Jackson Huckaby
Constructing a Tetrahedron
The goal of our unit is to allow students to explore and discover how to properly create a circumsphere around a tetrahedron by locating the tertahedrons circumcenter.
In lesson one we went through the thought process behind how to locate the circumcenter of a triangle, a 2d object. Now we will move into the 3D world.
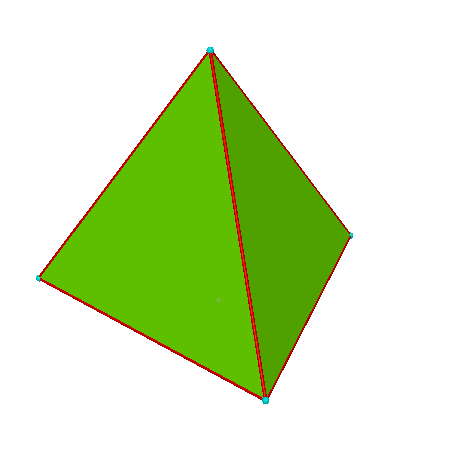
The object we are dealing with is a tetrahedron. This can be seen below:
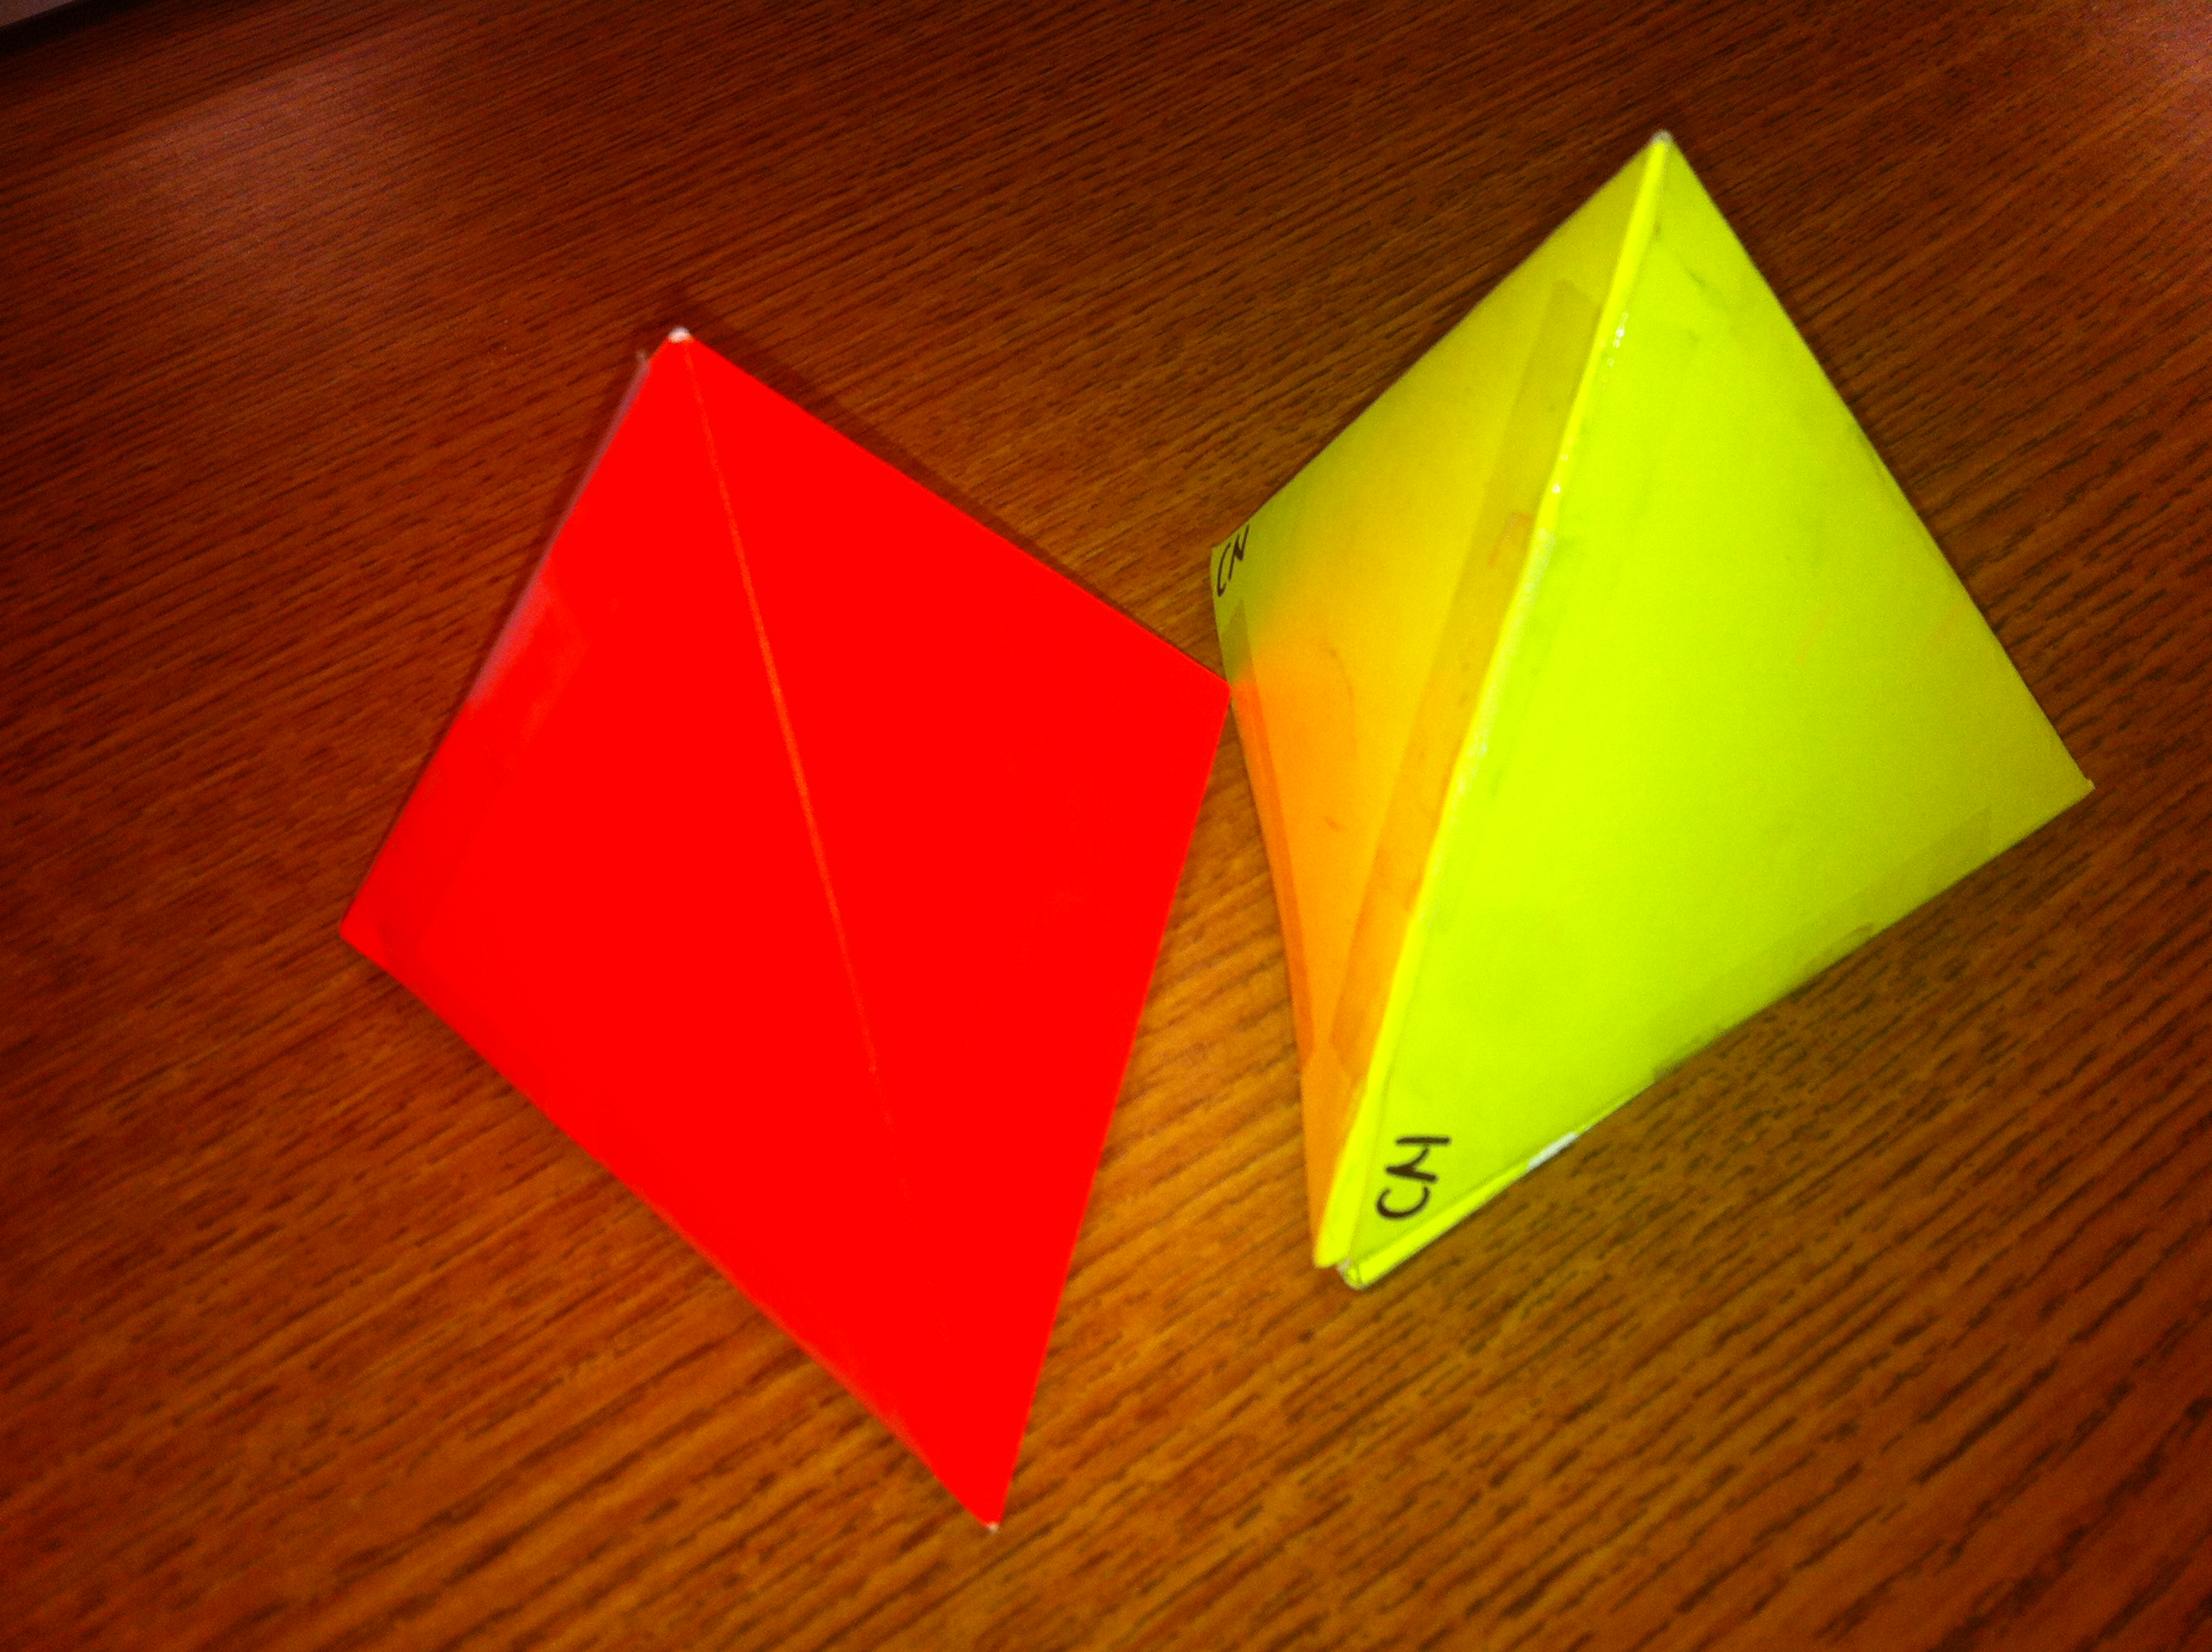
Because it is hard to truely visualize this 3 diminsional object in this 2d plane, we will have the students construct cardboard models of the tetrahedron for the students to have.
Constructing the tetrahedron can be done in two ways. The way we will pursue it will be to have the students construct the map for the tetrahedron individually with ruler and compass.
Each student will need a sheet of poster board, or heavy construction paper to work with. Students will also need a ruler, straight edge, sissors, and some tape.
The first tetrahedron that we will consider will be made up of equilateral triangles. This is the most basic tetrahedron and more can be pursued individually as an extension. Students will need to construct an equilateral triangle with any reasonable side length.
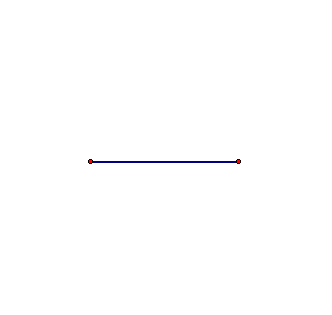
We remember that an equilateral triangle has three equal sides. So in order to complete the triangle we need to find the point that is equidistant to both endpoints of our line segment.
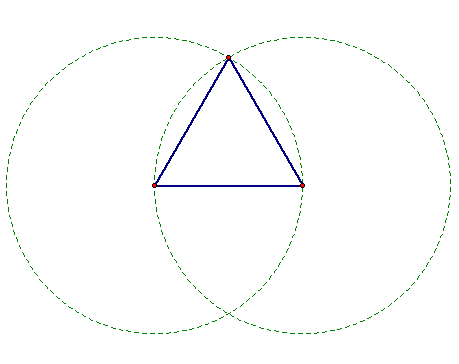
To do this we will construct circles with a radius of the length of the segment, centered at each endpoint.
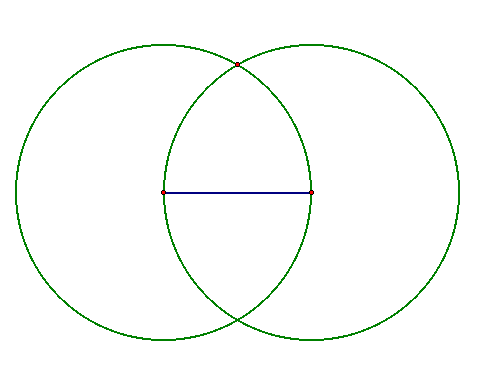
Doing this has allowed us to locate the third vertex of the triangle. The point of intersection between the two circles will create an equilateral triangle.
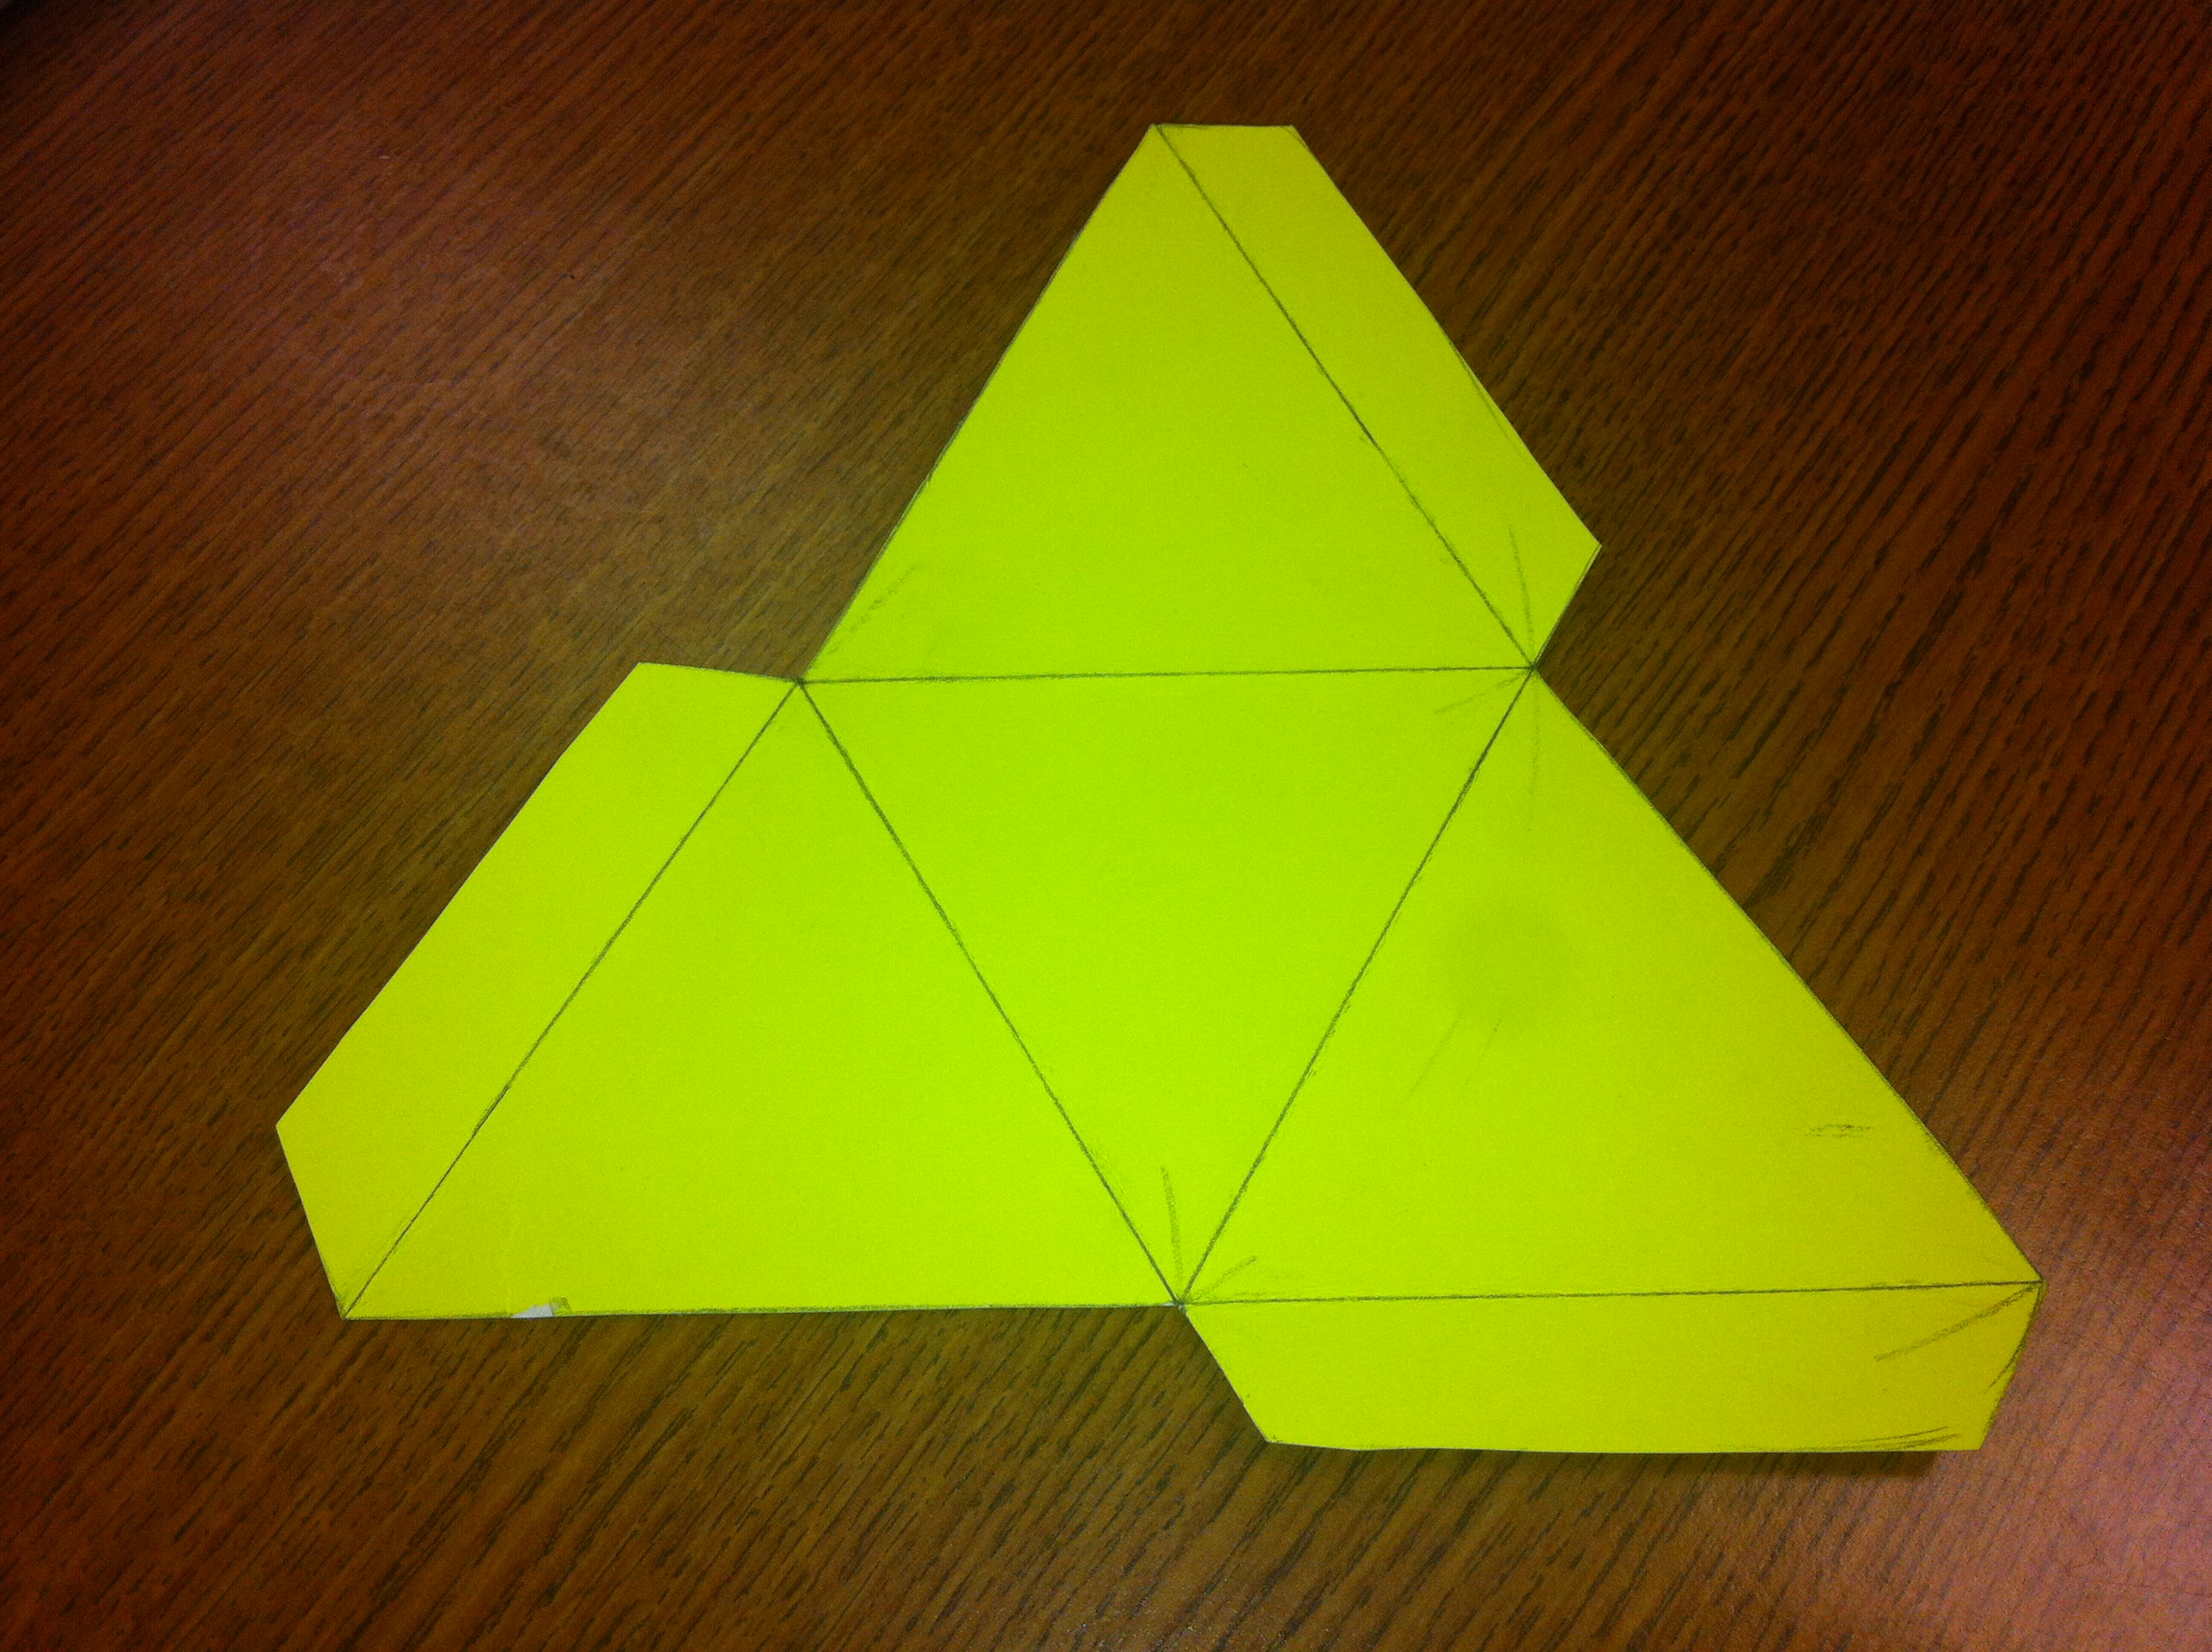
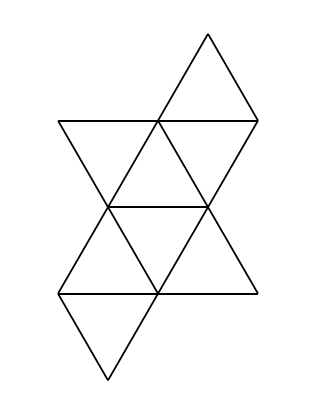
Now that students have mastered this technique they can continue on to making the map for the tetrahedron. A map will be the outline of the tetrahedron if it were to be unfolded and laid flat in a 2d plane. In this case the posterboard. Students will need to spatially determine how to construct this map. Things to consider will be how many faces a tetrahedron has and where they need to be connected so the resulting picture can be cut out and folded together. A finished map can be seen here.
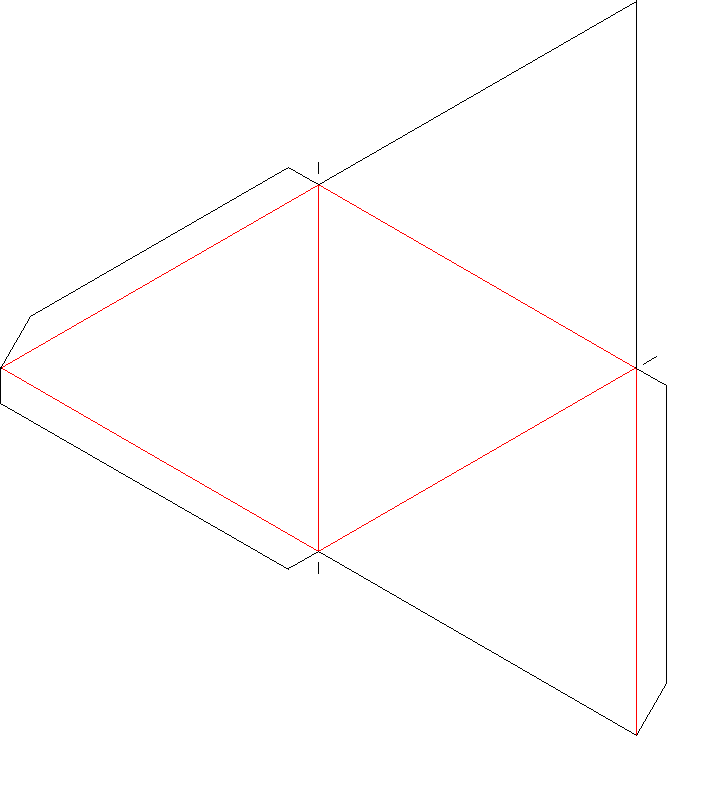
Notice, I have included extra tabs on the edges of the triangles to make it easier to tape together, these are not required. This process could also be done on GSP and printed out, however I think there is value in using ruler and compass on occasions.
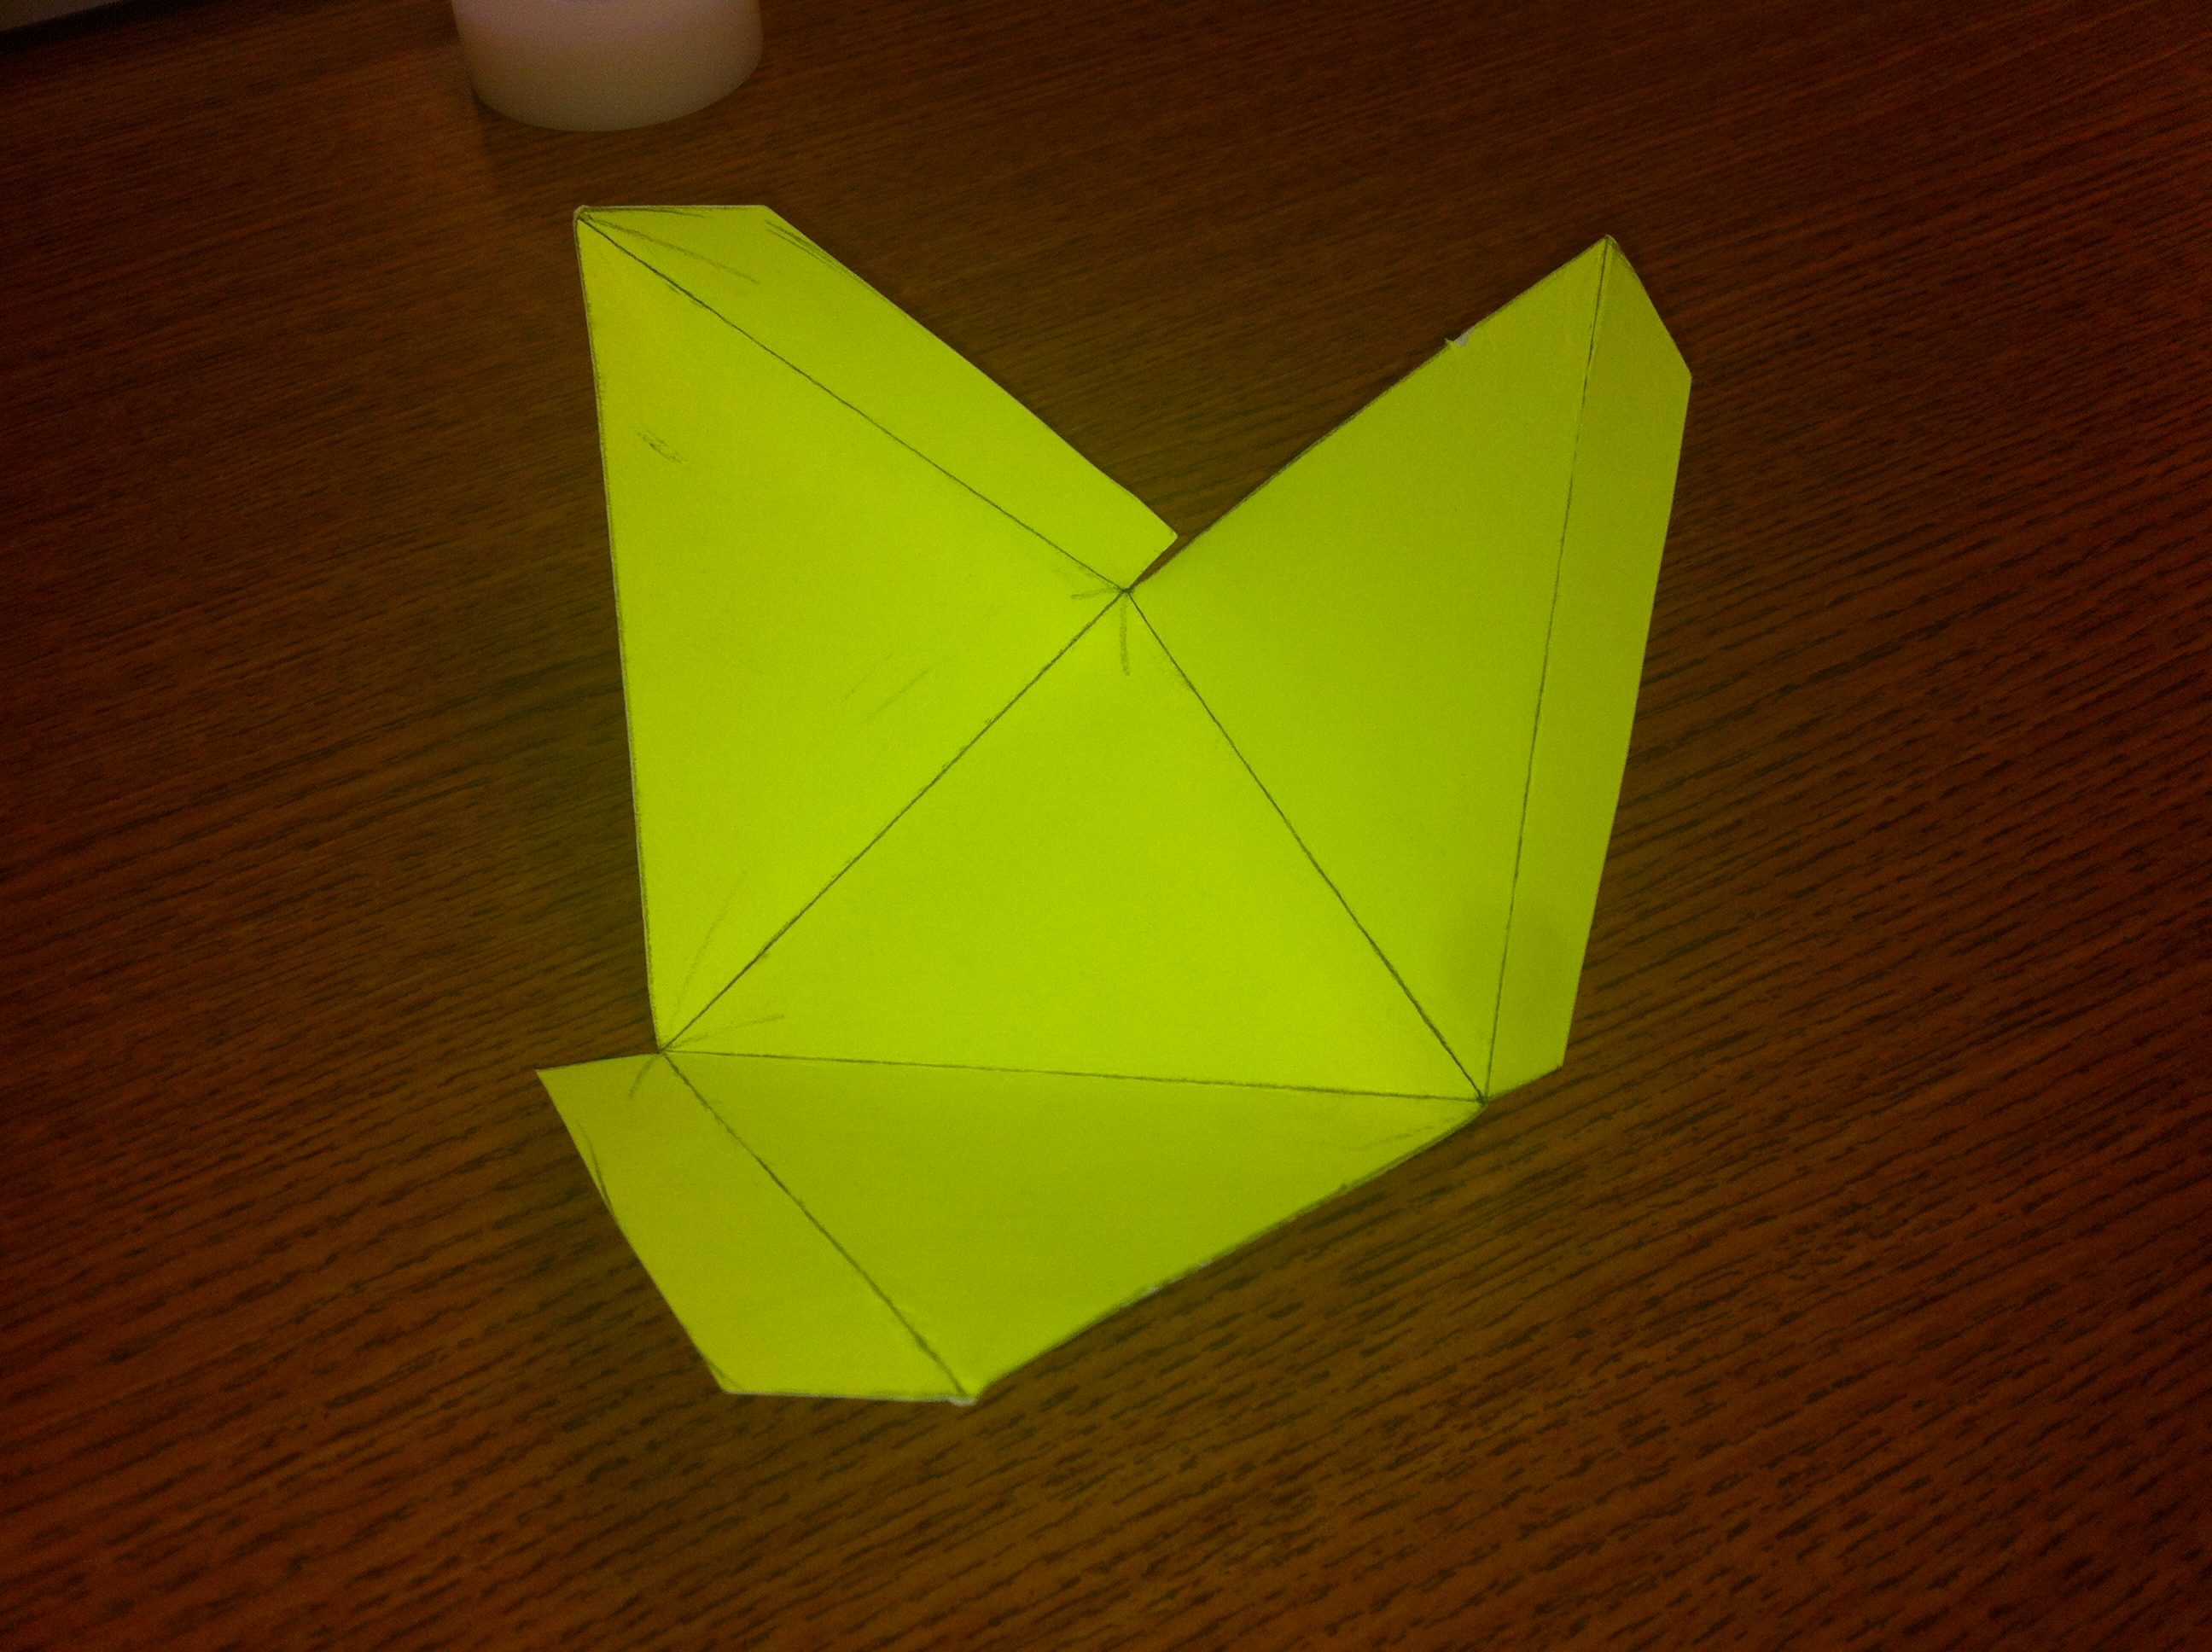
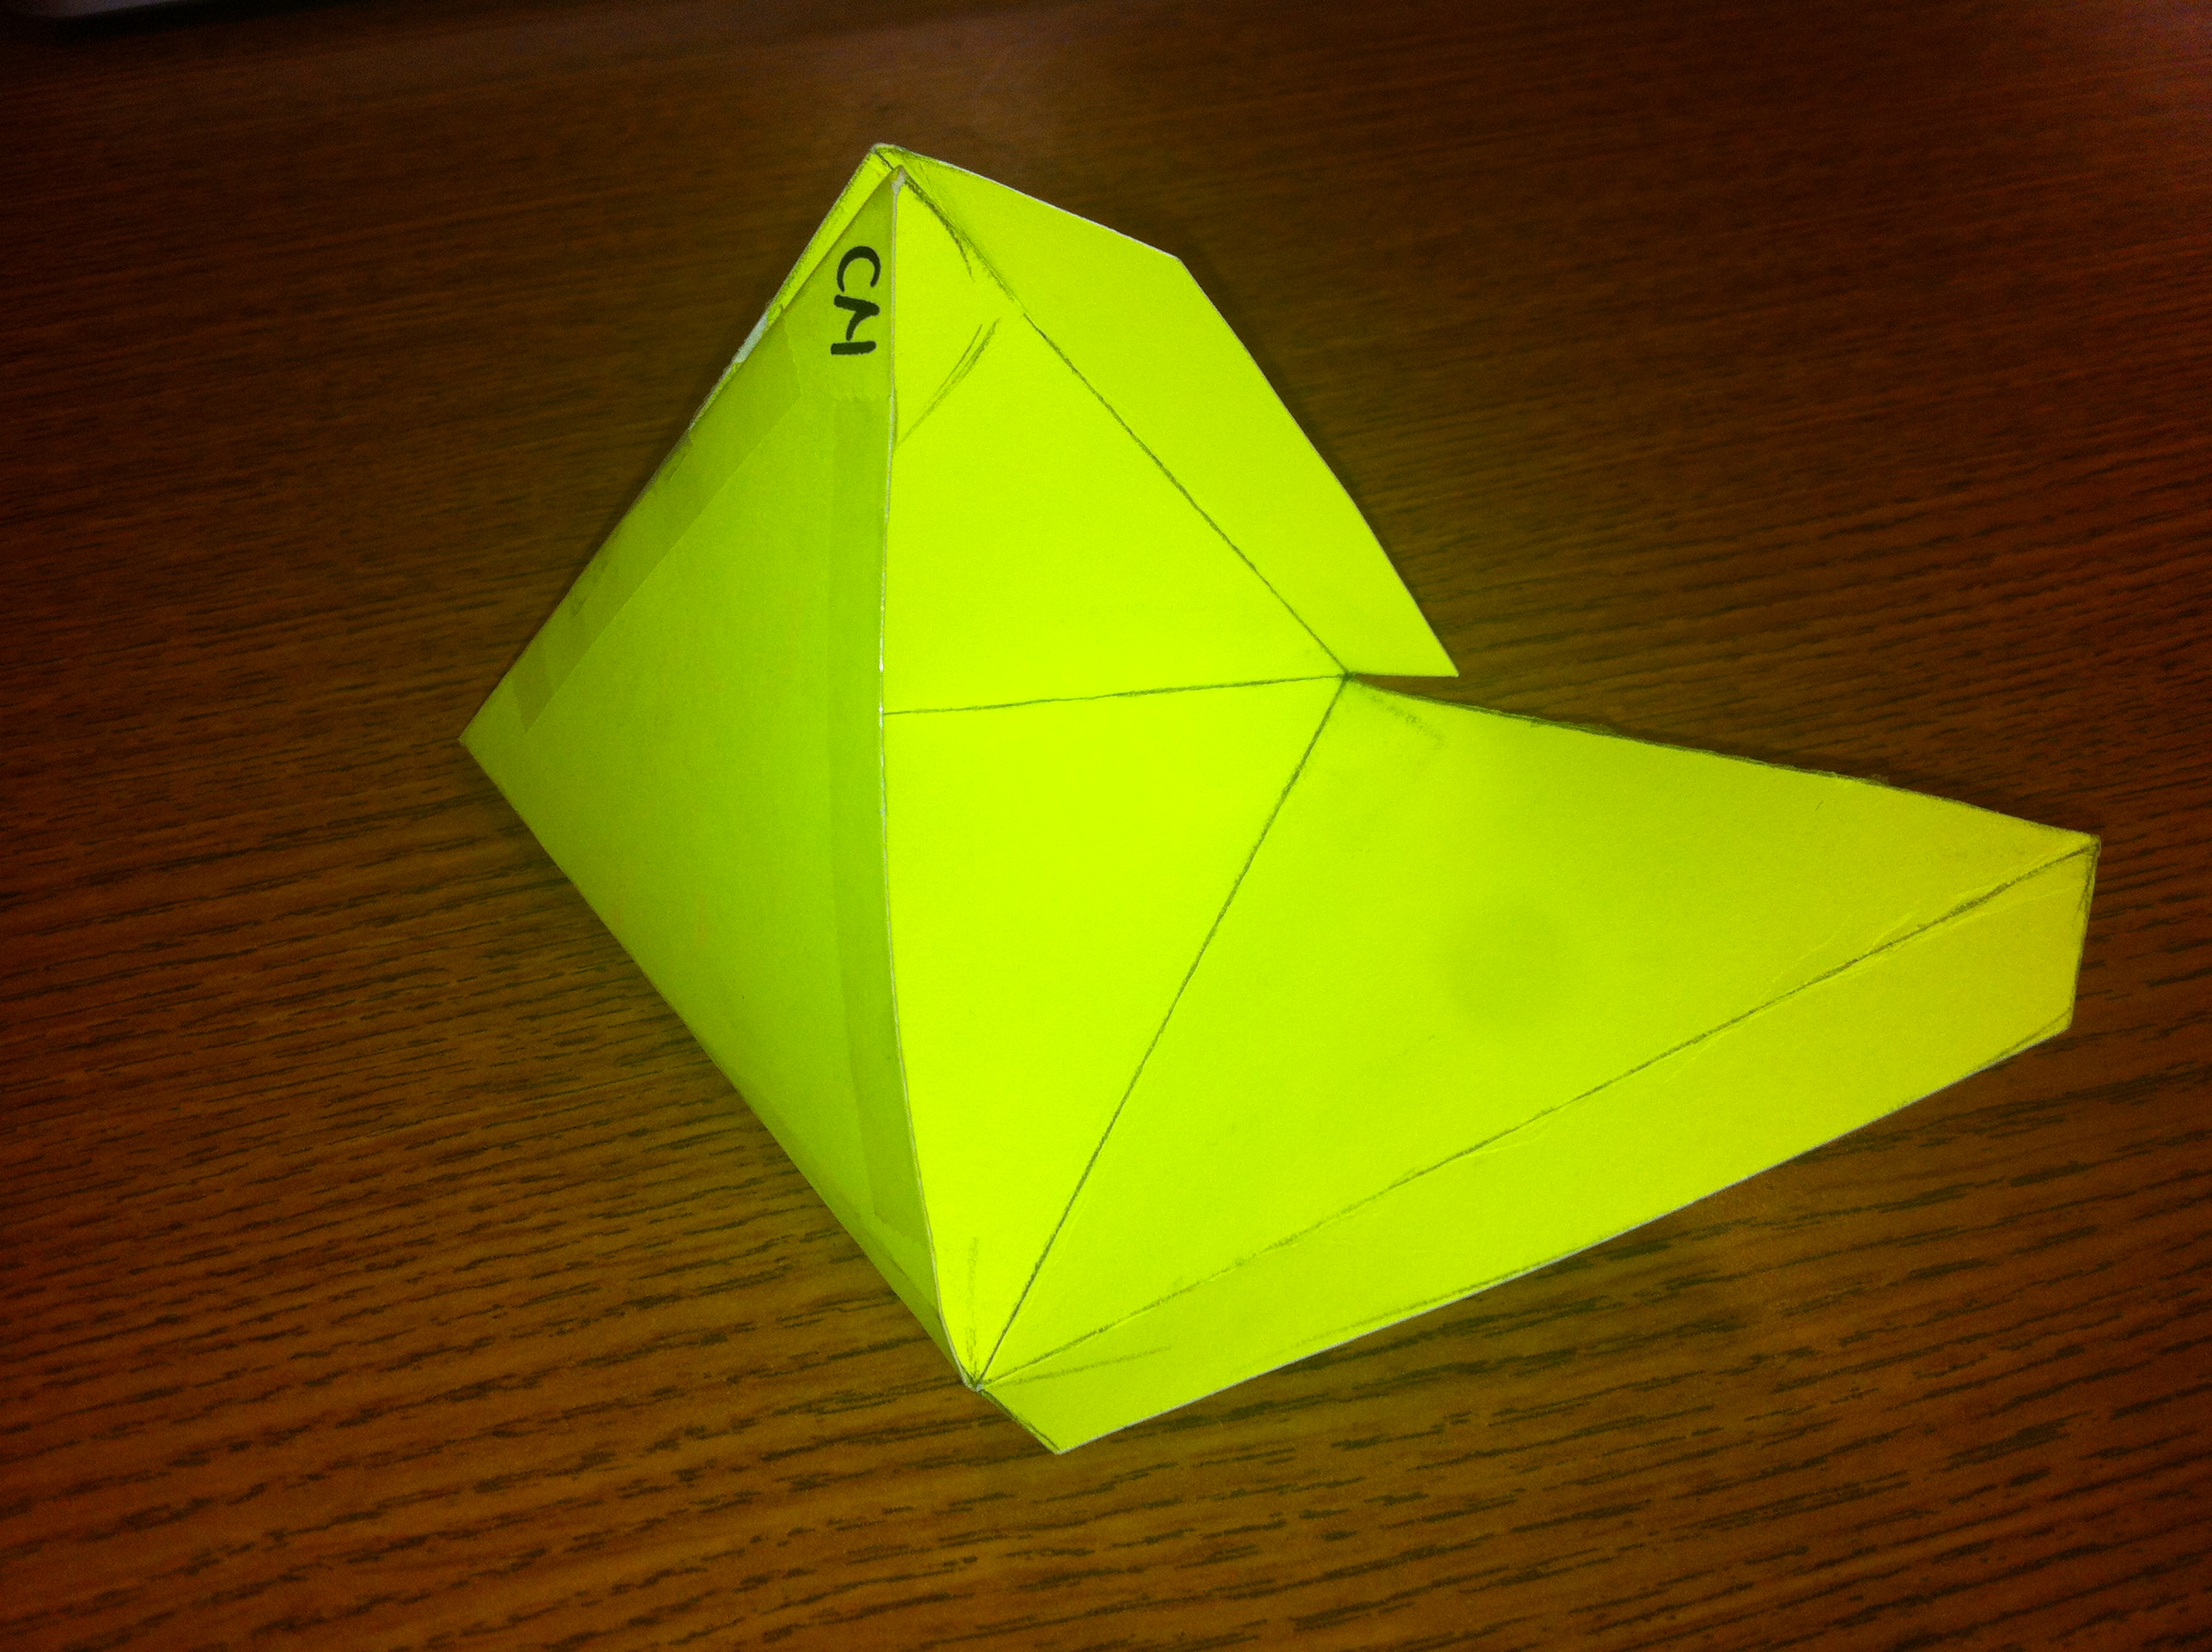
Here are some picture examples of an actual construction:
Students can also create other shapes if time permits.
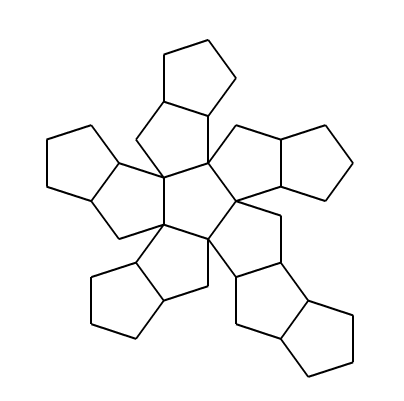
Here are a few more examples of sample maps:
Icosohedron:

Dodecahedron:
Octahedron:
Return to unit.