
The purpose of this investigation is to show the parabola in it's truest form. Not by equation but by definition and by the locus of points. To access the links you will need to have Geometry Sketch Pad 4.0 or better on your computer. This investigation will go step by step on how to produce a parabola by definition on GSP. To start let's refresh the mathematical definition of a parabola:
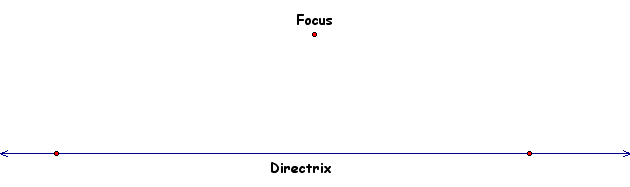
We will assume the focus is not on the directrix. To start this process we will draw the directrix:
Next we fix a point not on the line or as by definition the focus.
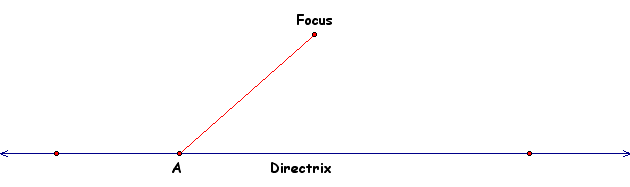
For animation purposes (you with GSP will understand later) we will put an arbitrary pt on the directrix. We will label this point A.

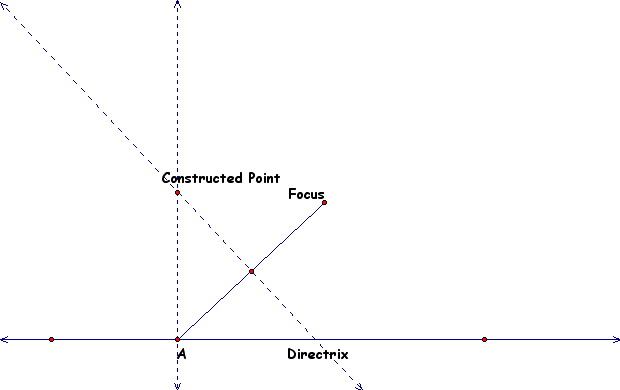
Now before we worry about finding all points that satisfy the definition of parabola let's construct one. By definition we know that this constructed point is equal distances from focus and the directrix. We will make this point equal distance from the focus and A and this will satisfy the definition since A is on the directrix. To do this we will need to construct an isoceles triangle with the base of the isoceles triangle running from A to the Focus. Let's draw that first.
Our constructed point will be the vertex of the isoceles triangle. By definition we know that the altitude running from the vertex to the base side of an isoceles triangle is also the median. So we will construct the midpoint of the base first.
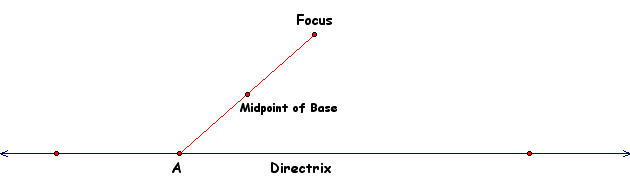
We will then construct a perpendicular line from the midpoint.
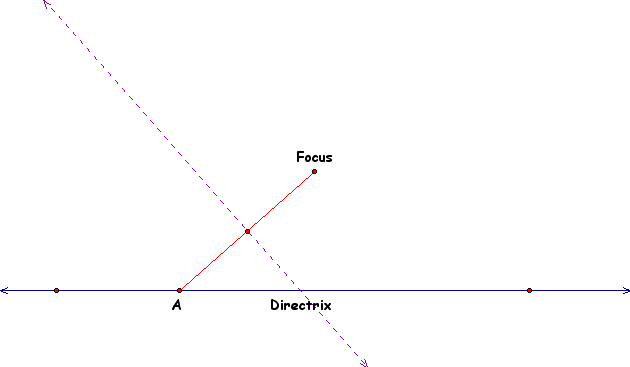
Now we will construct a perpendicular line from the directrix through A. The point of intersection to the perpendicular from the base of our isoceles triangle will be the vertex of the isoceles triangle or the constructed point we are looking for.
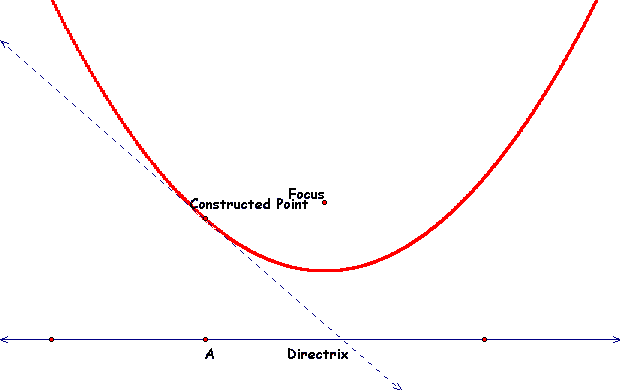
All that needs to be done now is trace all the points from our constructed point and slide A across and back along the directrix. Note I have hidden the the perpendicular segment at A as well as the midpoint and the base. The resulting parabola will look like this:
To see this animation happen: CLICK HERE!!!!!
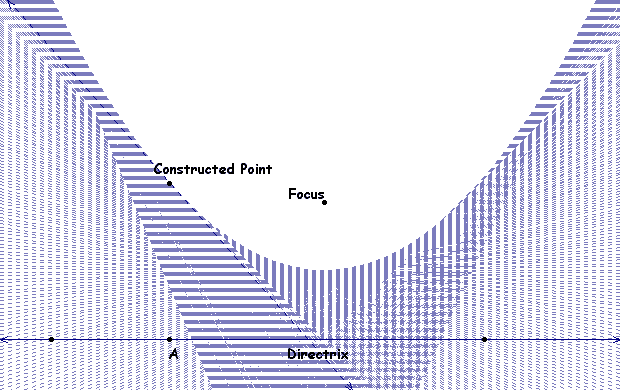
GSP does not prove this but the line that was left on the sketch (the perpendicular to the base of the isoceles triangle) is also tangent to the curve at the constructed point. We can show the same parabola by shading the area that bounds the outside of it. We can do this by tracing the tangent line and animating point A. The resulting picture will look like this:
To see this animation happen: CLICK HERE!!!!
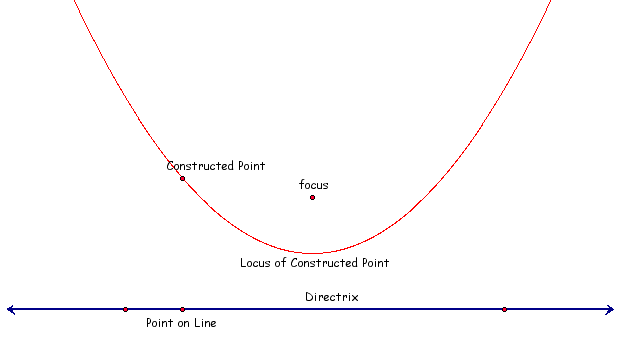
A second way to construct a parabola by rule on GSP is to use the locus of the constructed point as well it can be done with the locus of the tangent line. I have created another pair of parabolas this way.

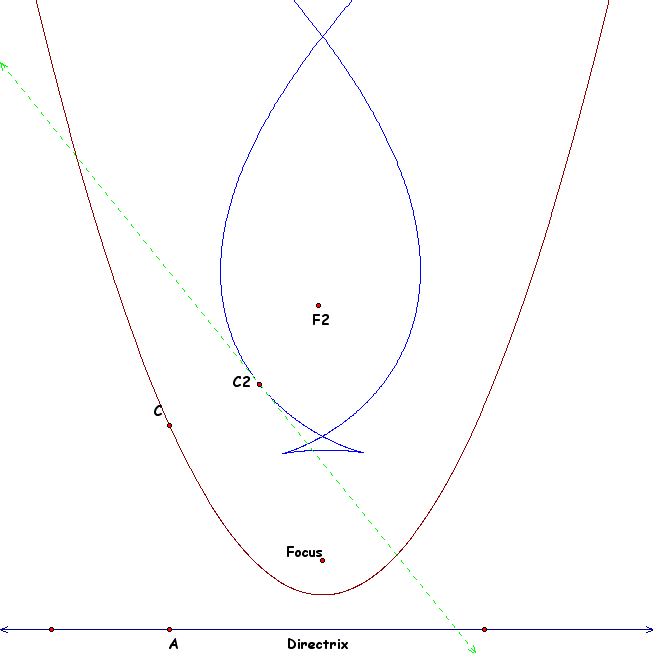
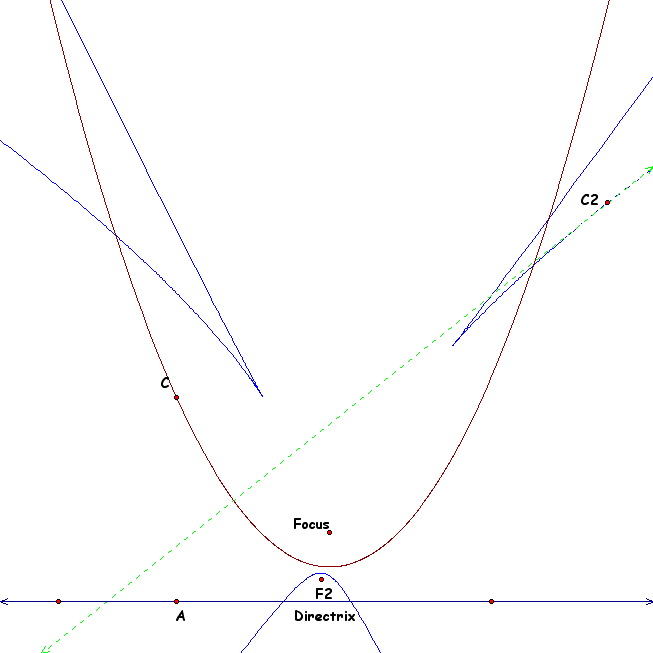
We see that the parabola it perfectly represented by GSP by it's definition. Let' apply the definition of a parabola to a new focus and using the tangent line to our constructed point as a "directrix". For the rest of the demonstration the focus will be "F", the constructed point will be "C", our new constructed point will be "C2" and our new focus will be "F2". When we apply the definition to these new components we will use the same process of building an isoceles triangle. The construction will look as so:
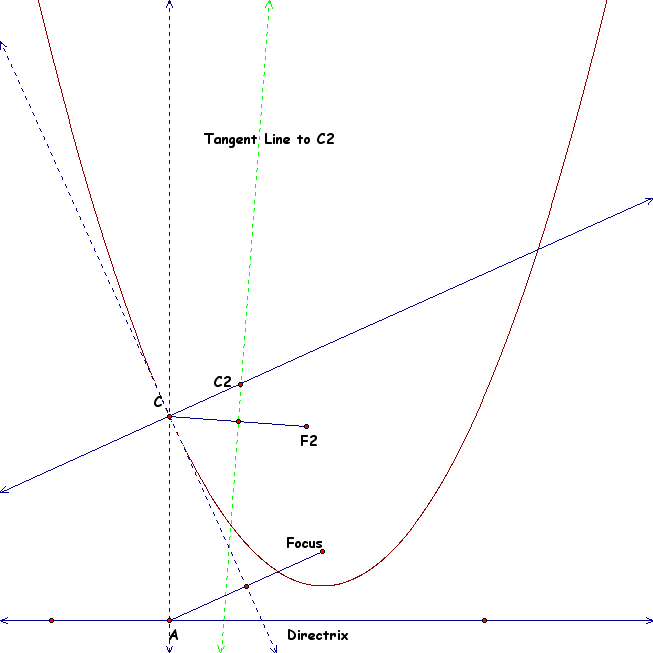
Now we can animate C along the parabola and trace C2. To move C along the parabola we will need to move A along the original directrix. When we do this we obtain the second order quadratic that looks as so:
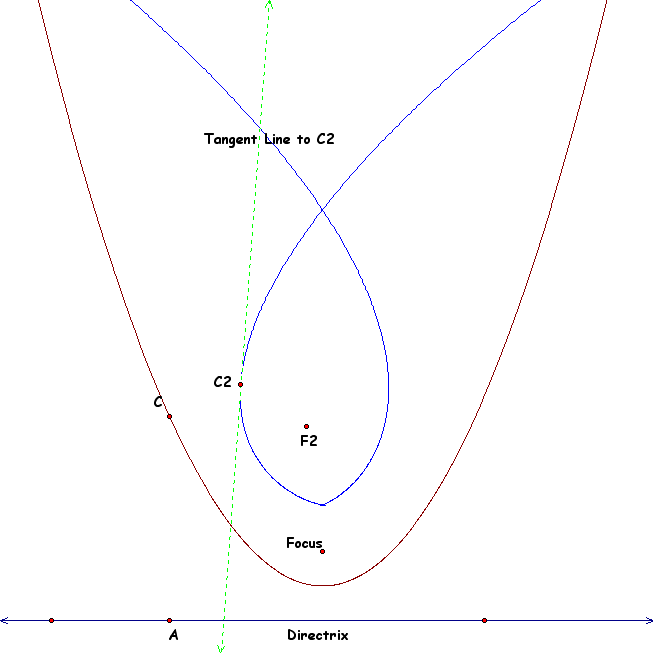
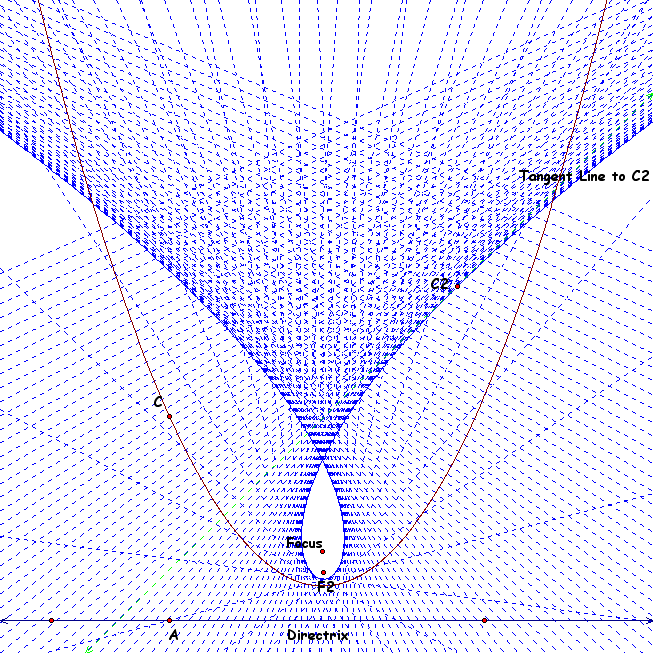
We notice that this second order parabola crosses at a point above the parabola and moves out away from the intersection at almost a linear pace. If we take the locus of the tangent line to C2 we get a picture that is both indicative of the new conic and visually impressive:
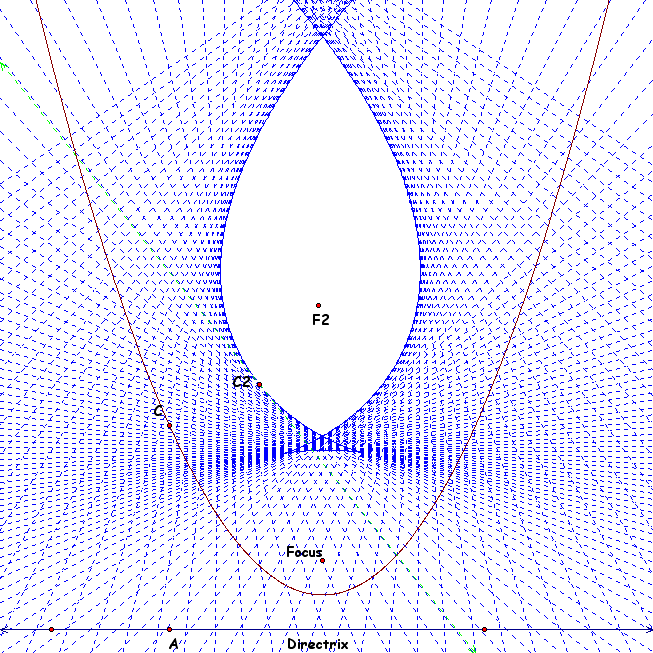
Now before we assume that all second-order parabolas look as such. Let's move F2 around a bit in the interior of our original parabola. If we move F2 below F the sketch looks somewhat similar:
With a locus of the tangent line as so:
If we move F2 up higher than originally we get a sketch that is somewhat different.
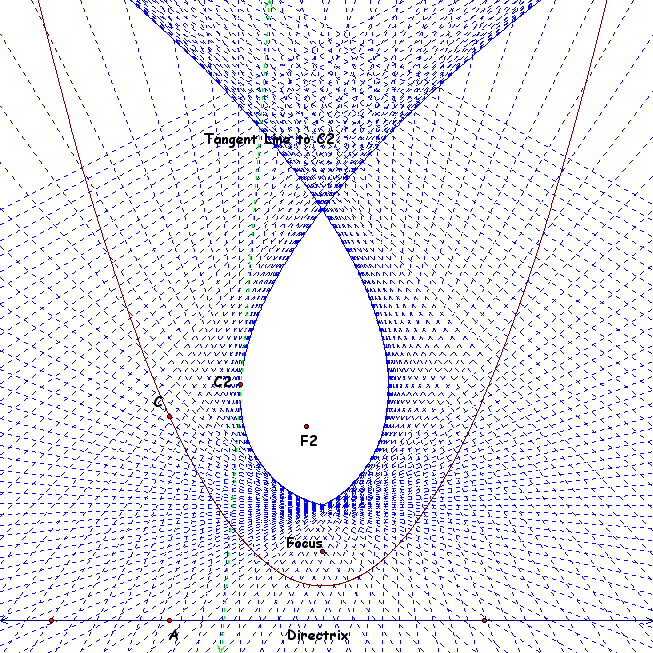
Now the sketch changes. If we look now there appears to be a "tail" on our new conic. There are now two points of intersection on the curve. If we are to play with the focus and keep moving it higher we will see the tail grow larger. Since we have been looking at the locus of the tangent line during this investigation it would be remiss to exclude it.... so here it is:
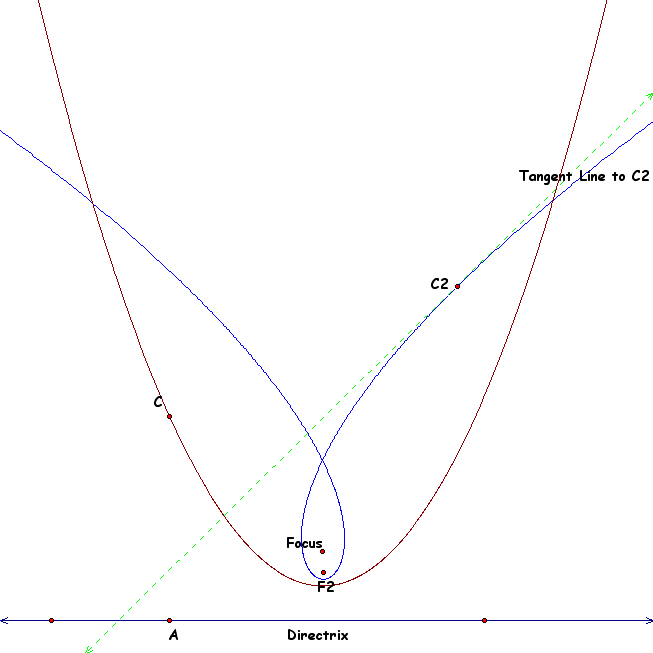
Now we see what happens to the second-order parabola when the F2 is in the interior. Let's move F2 outside of the parabola and see what happens:
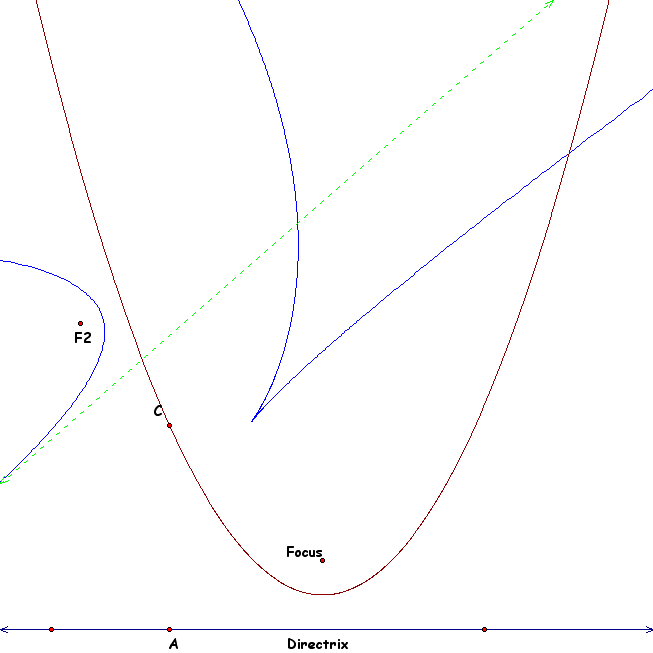
We now see a picture that is broken into parts. Though visually we see only two parts we cannot conclude that there will be two breaks due to size of the picture. In fact by manipulating F2 we can see three breaks.
To manipulate the second-order parabola: CLICK HERE
Hopefully after reading this you will see that parabolas are more than equations and quadratic formulas. If there are any questions about any of these constructions send me a line on my email on my page. Happy Sketching!!!
BFM
RETURN to Brock F. Miller Page