I completed this essay as if I was teaching transformations to a high school Geometry class.
Figures in a plane can be reflected, rotated, translated or
dilated to produce new figures. These new figures are called
images and the original figures are called preimages. The operation
that maps(moves)the preimage onto the image is called a transformation.
There are 3 basic transformations that are related to congruence(isometries):
reflections, rotations, and translations. There is also one transformation
that is related to similarity; a dilation. In each of the figures
that follow, the red figure is the preimage and the black figure
is the image. Each of the transformations is labeled. Be sure
that when you name an image, take the corresponding point of the
preimage and add a prime symbol.
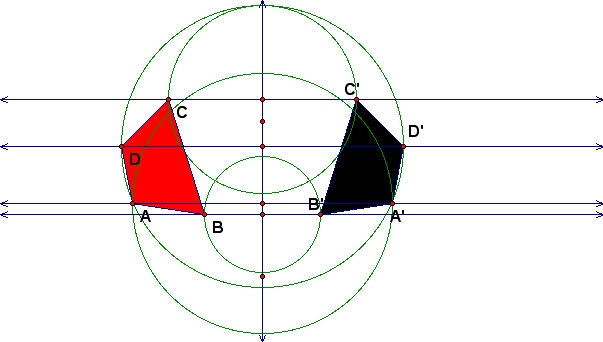
A reflection uses a line that acts like a mirror, with an image reflected in the line (also called the line of reflection). Using the GSP transform menu, you can create a visual display of a reflection by starting with a figure and a line of reflection(mirror). After completing this, highlight the line of reflection and select mark mirror from the transform menu. Next, all you need to do is highlight the figure and select reflect from the transform menu.

Can you create a Reflection using only the GSP Construct menu? Yes,to do this follow the same steps as before by creating your figure and a mirror line. Next, construct lines through each of the vertices of the figure that are perpendicular to the given mirror line. Then construct circles from the intersections of the lines and the perpendicular to the original figure.
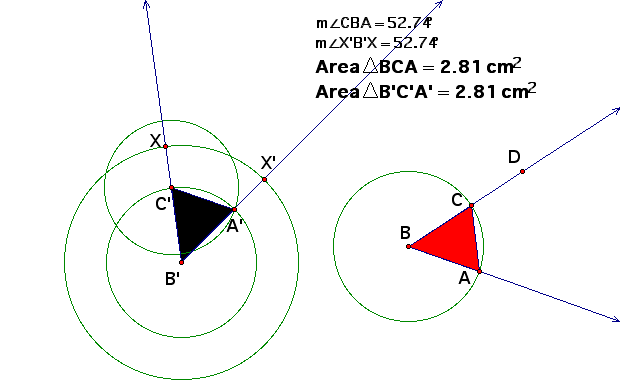
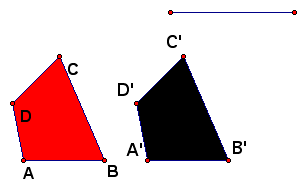
A rotation is a transformation in which a figure is turned about a fixed point. The fixed point is the center of rotation. Rays drawn from the center of rotation to a point and its image form an angle called the angle of rotation. Rotations can be clockwise or counterclockwise. To illustrate a rotation in GSP, we need a figure, an angle and a point to use as our center of rotation. We must mark our center of rotation by double clicking the point and mark our angle by highlighting the angle and selecting mark angle from the transform menu. Next, just highlight the figure and select rotate from the transform menu.
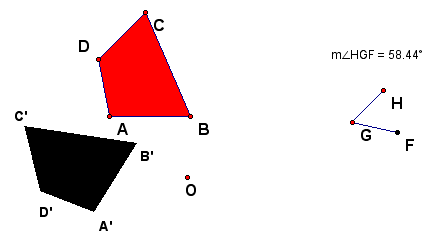
Can you create a Rotation using only the GSP Construct menu? Yes,to do this follow the same steps as before by creating your figure, a center and an angle. Be sure to label these appropriately. To illustrate this transformation, you must label the center as the intersection of the 2 lines. Next construct several circles using the vertices of the figure ABC. This gives us a rotation of our original figure.
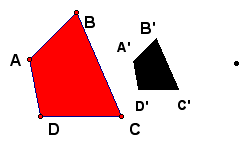
A translation, also referred to as a glide, is merely just a shift of all points of the plane the same distance in the same direction. A translation can be illustrated in GSP very easily using the transform menu. Again, we need a figure. We also need a translation vector. Simply mark the vector, highlight the figure and choose translate from the transform menu.
We can also illustrate a translation using only the construct menu. One convenient way to do this is using circles and parallel lines.
Notice that all three of the transformations discussed so far preserve length, angle measures, parallel lines and distances between them (congruence mappings).
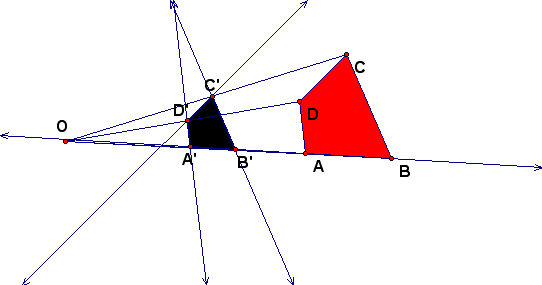
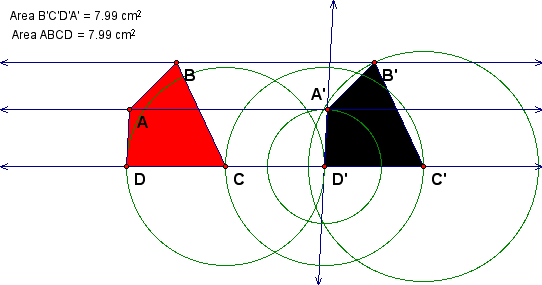
The final transformation is related to similarity rather than congruence. It is called a dilation. Dilations preserve angle measures. Think of an object that has been dilated as an object that has been scaled. It's like drawing a soccer field on paper vs. actually building a field. A dilation moves any object onto a similar object. In gsp, all you need to illustrate a dilation is a figure and a center.
To illustrate a dilation only using the construct menu, connect
each of the vertices of the figure with a center point O. From
there, construct the necessary parallel lines, intersection points
and label your scaled figure.