
Lesson
3:
Circles
By
Carly Coffman

Throughout
this lesson, we will be exploring circles and the equations of circles.
First, open
a Microsoft Word document, title it as “Circle”, and type your name and period
under the title. Remember, any questions
asked in this lesson should be answered in complete sentences in your Word
document. You do not have to type the
questions. Also, feel free to add any
facts or findings that you come across during the lesson.
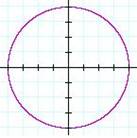
Now we’re
ready to begin. We will begin with a
circle centered at the origin. Look at
what happens when the constant on the right side of the equation is changed. Click on the play button at the bottom of the
screen when you open the following link.
1)
Record the
values of the constant on the right side of the equation, n, when the
radius
of the circle is 4, 3, 2, and 1. What is
the relationship?
Let’s
explore what happens if we change the constant to a negative number. Open exploration 1 and click on the n
button. Change the window to have n go
from -16 to 0 in 40 steps.
2)
What happens
when the constant on the right side of the equation (n) is negative? Why does
this happen? (Hint: look at the rest of the equation and think of
possible answers)
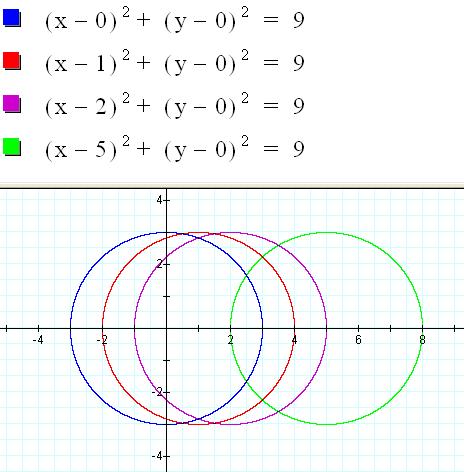
Now, let’s
explore what changing h and k does to the circle. We will leave the radius at 3 throughout this
part of our investigation. Let’s begin
by making both variables 0 and changing only h. Look at what happens.
3)
What happens
to the circle when h increases? What
part of the circle does h affect?
Look at the
following exploration to explore other values of h.
4)
Create a
table and list the values of h from the picture above #3 and some negative
values
of h from the exploration. In the other
column list the coordinates of the centers of each circle. What do you notice?
Now, let’s
look at k. We will leave h at 0 and the
radius as 3. Click on the play button on
the bottom and feel free to change the values of k around by clicking on the k
button and adjusting the lowest and highest values.
5)
Create
another table and list values of k in one column (include positive and negative
values)
and list the coordinates of the center of each circle in the second column. What do you notice?
So, now you
should be able to determine the center and radius of a circle just by looking
at the equation. You can check each
answer by clicking on an exploration or opening Graphing Calculator (also known
as NuCalc) and typing in the equation.
Determine the center and radius for each
of the following equations. Remember to
answer in
complete
sentences and include each equation (you can copy and paste the equations as
pictures).
6)

7)

8)

9)
![]()
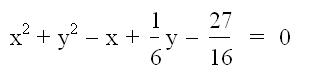
Extension:
If you are
given an equation that is not in the correct form, you can complete the square
to find the center and radius. Look at
this link to learn how.
Write each
equation in the form by using the method above. Then determine the center and radius for each circle.
10) ![]()
11) 
*Print this
document and place in your notebook or portfolio with “Conics” and “Ellipse”
papers.
Congratulations,
you are finished with the circle lesson!
Return to Home Page Next Lesson